The Sonoff S31 is an inexpensive WiFi-controlled switched outlet. Out of the box, the preloaded firmware ties it into various cloud services, but since it’s basically an ESP8266, a relay, and a small handful of other parts, it’s fairly easy to drop ESPHome (or other open-source firmware) onto the S31 so that it doesn’t phone home every time you use it to switch your coffee maker on and off.
Once ESPHome is on the S31, future updates are carried out over WiFi. The initial installation, however, must be done over a serial connection with the device opened up. This, however, is easy…and since it’s done with the S31 unplugged, no dangerous voltages will be present.
You’ll need a few things:
- a USB-to-serial converter that runs at 3.3V (this converter that I bought to program ESP-01 boards works well, and it’s so cheap that they give you two!)
- some header pins (break off two 4-pin lengths)
- some test hook leads to make connections between the two boards
Software-wise, I’ll assume that you’re running Linux. You can have ESPHome installed on your computer however your distro provides, or you can run the Docker container that’s available. Since containers are distro-independent, I’ll follow that route when we get to it.
First, we need to disassemble the S31. The gray cap on the end with the power button can be pried off with your thumbnail, spudger, guitar pick, or similar implement. There’s usually a small gap on the back to facilitate this…the picture shows the cap loosened:
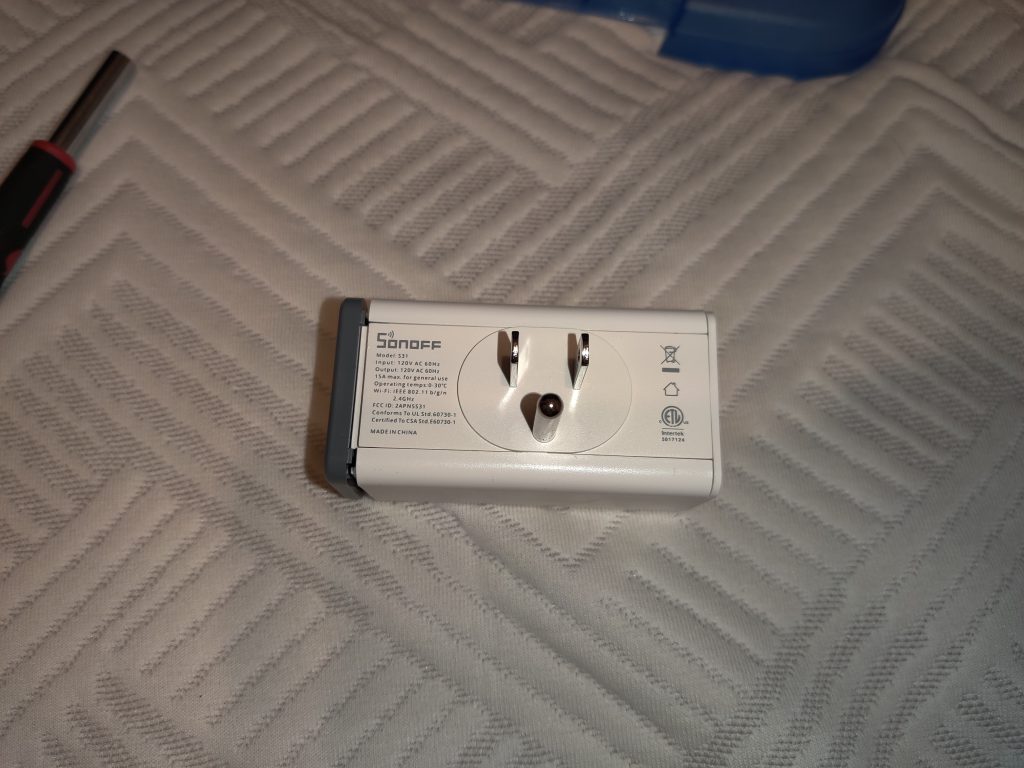
With the cap off, there are two trim strips that slide out to reveal three screws:
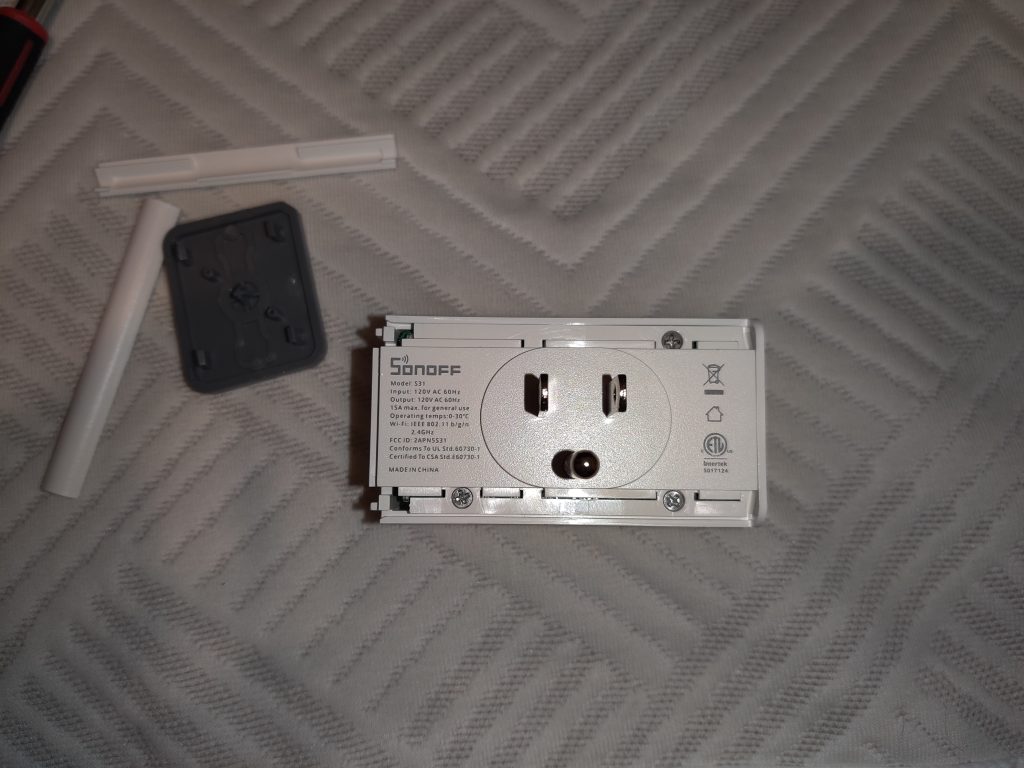
Remove these screws and pull the front of the case off of the rest of the unit. This will expose the output power terminals and a circuit board on the side:
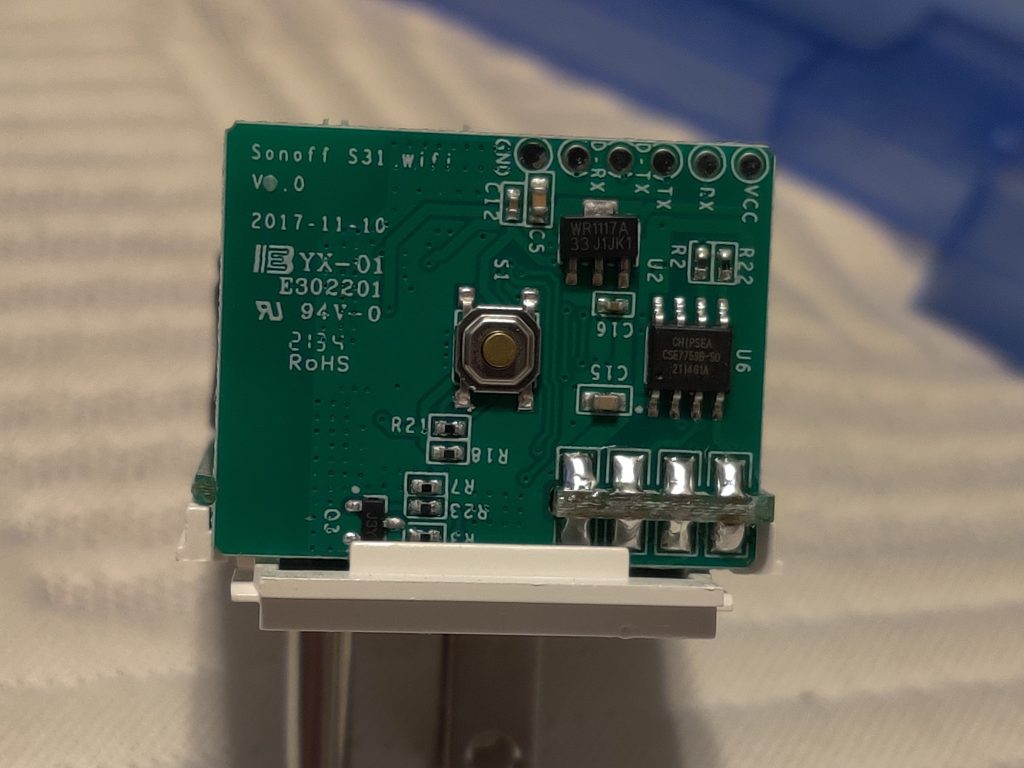
The power button is in the middle. The serial port is on the six pads in the upper right. We’ll use four of the pads: VCC and GND are connected to 3.3V power and RX and TX carry data. (Don’t use the pins labeled D-RX and D-TX.)
Plug the header pins into the USB-to-serial adapter and connect four of your test hook leads as shown below:
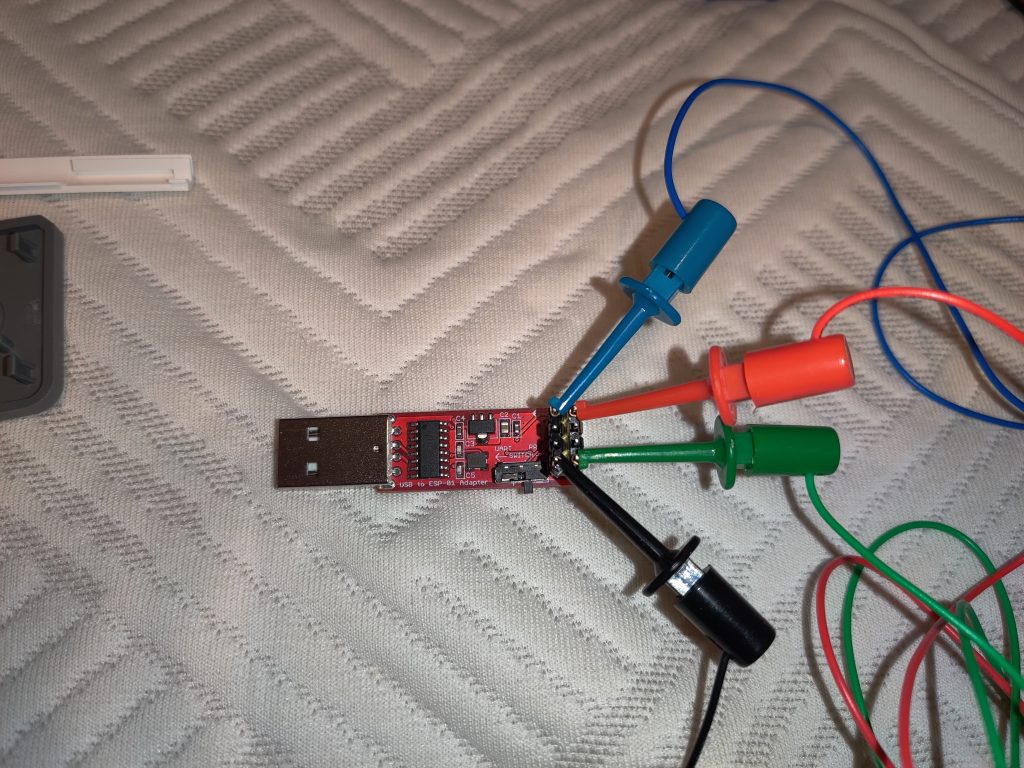
With the colors I’m using, red is 3.3V, black is GND, blue is TX (which will be connected to RX on the S31), and green is RX (which will be connected to TX on the S31).
Next, connect the other ends of the leads to the S31:
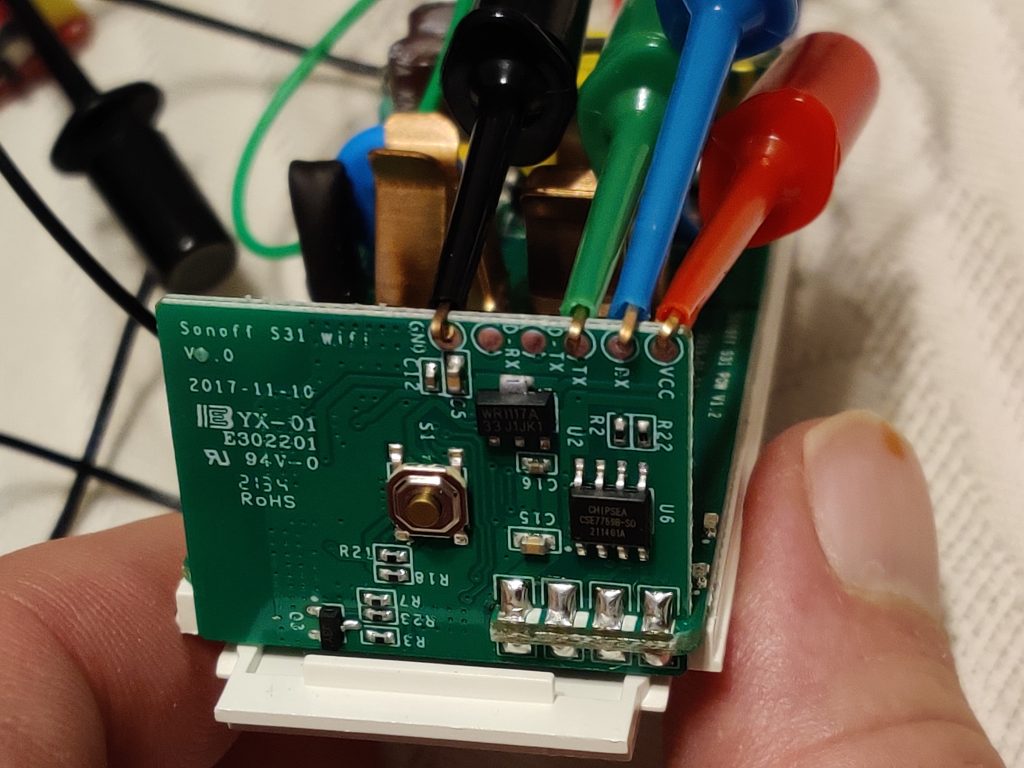
Hold down the button when you plug the adapter into an available USB port; this kicks the S31 into bootloader mode, preparing it to receive firmware.
If this is your first time using ESPHome, create a directory to store device configurations. You might want to check it into Git or other version control as you add/edit devices, but that’s beyond the scope of this document.
mkdir ~/esphome-configsFire up ESPHome. First, launch the server (if your USB serial adapter isn’t on /dev/ttyUSB0, substitute its actual location below):
docker run -it --rm --device /dev/ttyUSB0 -v ~/esphome-configs:/config -v /usr/share/fonts:/usr/share/fonts --network host esphome/esphomeThen, pop open a web browser and go to http://localhost:6052. Hit the “New Device” button down in the lower right. In the dialog that pops up, give your new device a name…could be related to its location, what it will control, or whatever. In the “Select your ESP device” dialog, select “Pick specific board” and choose “Generic ESP8266 (for example Sonoff)”. Instead of clicking Install, press Esc because we need to customize the configuration. On the new device entry, click Edit and replace the contents with the following. Customize the device name and WiFi credentials appropriately:
# Basic Config
esphome:
  name: [device name goes here]
  platform: ESP8266
  board: esp01_1m

wifi:
  ssid: "[your WiFi SSID goes here]"
  password: "[your WiFi password goes here]"

logger:
  baud_rate: 0 # (UART logging interferes with cse7766)

api:

ota:

web_server:
  port: 80

# Device Specific Config

uart:
  rx_pin: RX
  baud_rate: 4800

binary_sensor:
  - platform: gpio
    pin:
      number: GPIO0
      mode: INPUT_PULLUP
      inverted: True
    name: "button"
    on_press:
      - switch.toggle: relay
  - platform: status
    name: "status"

sensor:
  - platform: wifi_signal
    name: "wifi_signal"
    update_interval: 60s
  - platform: cse7766
    current:
      name: "current"
      accuracy_decimals: 1
    voltage:
      name: "voltage"
      accuracy_decimals: 1
    power:
      name: "power"
      accuracy_decimals: 1
      id: power
  - platform: integration
    name: "energy"
    sensor: power
    time_unit: h
    unit_of_measurement: kWh
    filters:
      - multiply: 0.001

time:
  - platform: sntp
    id: the_time

switch:
  - platform: gpio
    name: "relay"
    pin: GPIO12
    id: relay
    restore_mode: ALWAYS_ON

status_led:
  pin: GPIO13
Click Save, then click Install. When asked how to install, click “Plug into the computer running ESPHome Dashboard,” select /dev/ttyUSB0, and then wait for the firmware to upload. When it’s done, unplug the adapter and plug it back in to reset. After a few seconds, the S31 should connect to your WiFi.
Reassembly is the reverse of disassembly. Once it’s put back together, plug the S31 into a wall outlet. After a few seconds, it should pop up on your network. You’re done! In the future, when you need to update or change firmware, you’ll be able to do so wirelessly, without unplugging it from the wall. You should only need to do this once for every S31 you want to use.