Category Archives: cool stuff

RPi CM4 + DFRobot IoT Router Carrier Board Mini + OpenWRT 21.02: getting it working

A little while back, I ran across this page about a couple of boards that turn a Raspberry Pi Compute Module 4 into a router. I’ve been running an Asus RT-AC56U for a while now and had been mulling over some upgrade options, and this sounded like a decent way to get OpenWRT back on my network. (I’d previously used it years ago on a Linksys WRT54GL, the OG router for which OpenWRT was originally developed, but never got around to running it on the newer router because there’s no support for 802.11ac on its Broadcom WiFi hardware.)

DFRobot CM4 IoT Router Carrier Board Mini

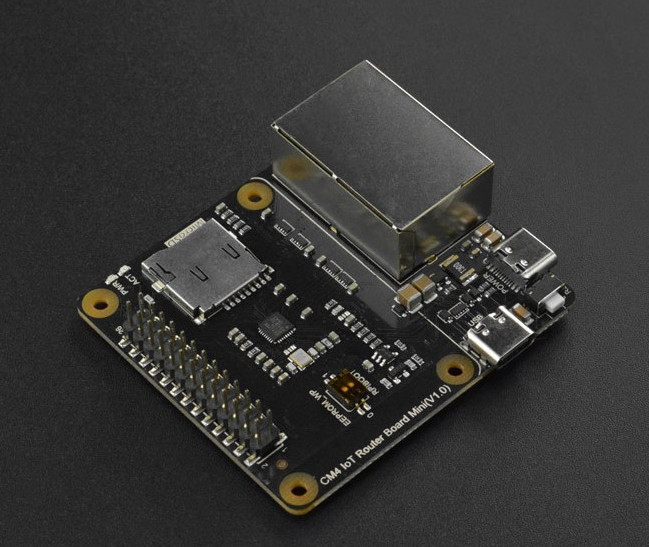
Of the two options presented, I picked the DFRobot IoT Router Carrier Board Mini because its second Ethernet port is connected directly to the CM4’s PCI Express port. (The other option inserted a USB 3.0 interface in between the two.) Nobody on this side of the pond had these in stock, but The Pi Hut had them available and shipping from the UK to the US didn’t take too long. (As I write this, they’re out of stock on all varieties of the Compute Module 4, so you’ll need to look around a bit to see if anybody has them at a not ridiculously marked-up price.)

Raspberry Pi Compute Module 4, without WiFi (as I ordered it)

I wanted to put stock OpenWRT on it, but the image they provide is missing the Realtek 8169 modules needed to get the second Ethernet port on the carrier board working. DFRobot provides an image with the needed modules already installed, but it’s of a 21.02 prelease. I tried upgrading it to 21.02 final, but it wouldn’t accept it.

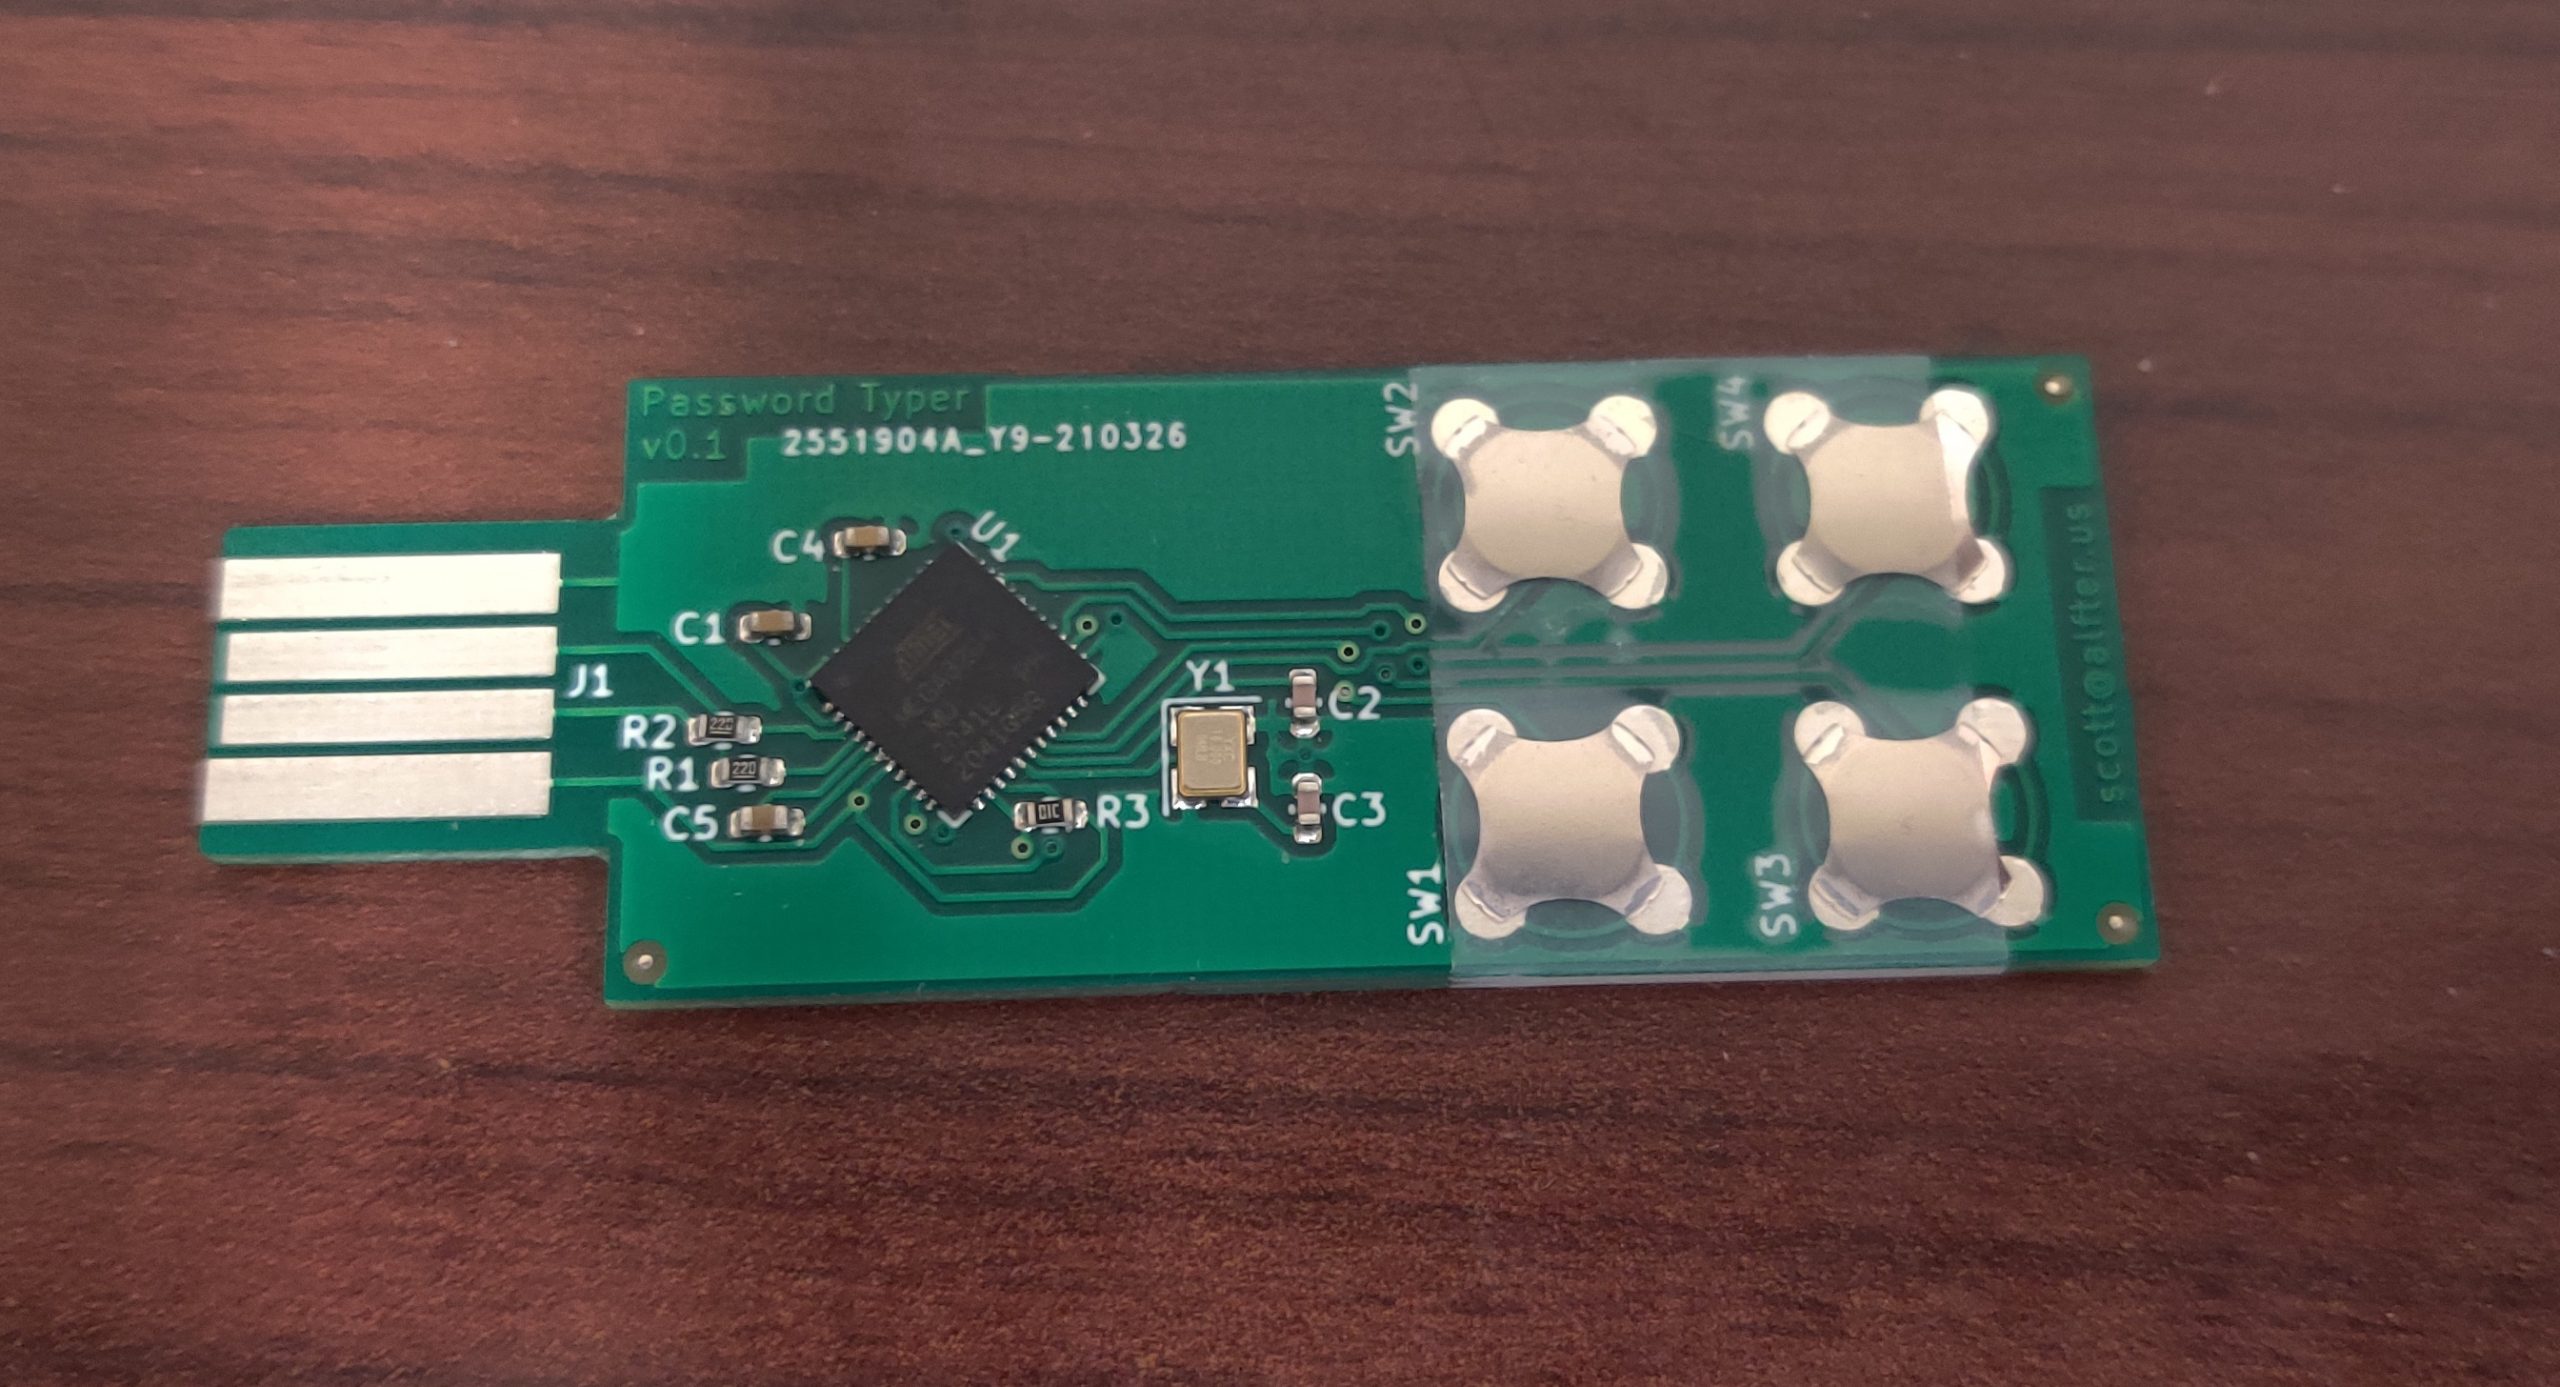
Through a bit of trial and error, I figured out the modules I needed to add to the stock image. They could be put on there while the stack was connected to my computer to flash the firmware. Once that was done, I extracted the OpenWRT configuration from the DFRobot image and copied it over as well. With all of that in place, it now boots up with the LAN interface on the PCIe Realtek interface (the one closer to the USB-C power connector) and the WAN interface on the CM4’s Broadcom interface (the other one). Getting it working was something like what follows. (Note: I bought a CM4 with onboard eMMC; the instructions reflect this. If you bought one without, you’ll need to write the firmware to a MicroSD card, which might actually be a bit easier to set up in hindsight. I wanted fewer parts, though, and I think eMMC is supposed to be a little bit faster. Also, these instructions assume you’re using Linux. Mac OS X might be slightly different. Windows will probably be considerably different, and an attempt at accessing the eMMC from Windows 10 according to DFRobot’s instructions failed.)

  1. Plug the CM4 into the carrier board. Be careful and make sure the two 100-pin connectors are properly aligned.
  2. Download the OpenWRT 21.02 release image and decompress it.
  3. Check out the Raspberry Pi usbboot tool and build it: git clone --depth=1 https://github.com/raspberrypi/usbboot && cd usbboot && make
    (note: you need libusb to build and use this)
  4. Peel the protective tape off of the switch block and use a small pointy object to flip the “USBBOOT” switch on (toward the MicroSD slot).
  5. Plug a USB A-to-C cable into the carrier’s port labeled “USB.” Plug a USB-C power supply into the port labeled “POWER.”
  6. Bring up the CM4 as a storage device: sudo ./rpiboot. Determine which device node it grabbed (dmesg is good for this); in my case, it was /dev/sda.
  7. Flash the OpenWRT image: dd if=openwrt-21.02.0-bcm27xx-bcm2711-rpi-4-ext4-factory.img of=/dev/sda bs=512 status=progress
  8. Resize /dev/sda2 to take up the rest of the storage space; gparted is a good tool for this.
  9. Mount /dev/sda2 someplace (I used /mnt/usbdisk as it was already there and not in use) and create a new directory: sudo mkdir /mnt/usbdisk/ipks
  10. Download these OpenWRT packages to get the Realtek 8169 working: r8169-firmware kmod-mii kmod-libphy kmod-phy-realtek kmod-r8169. Save them to /mnt/usbdisk/ipks.
  11. Download and uncompress the DFRobot prerelease image; we need to extract its config files.
  12. We need to find the start of the root partition within the image, so sudo gparted openwrt-bcm27xx-bcm2711-rpi-4-ext4-factory.img, right-click on the second partition, and click Information. Scroll up in the window that pops up to get the location of the first sector; for the image I downloaded, it was 147456. Multiplying this by 512 (the block size in bytes), we get 75497472; keep this number in mind. Close gparted.
  13. Mount the root partition and copy the config files over to the CM4: sudo mount -o loop,ro,offset=75497472 openwrt-bcm27xx-bcm2711-rpi-4-ext4-factory.img /mnt/tmp && sudo cp /mnt/tmp/etc/config/* /mnt/usbdisk/etc/config/
  14. sudo umount /mnt/usbdisk && sudo umount /mnt/tmp, and unplug the cables from the carrier board.
  15. Plug a USB-to-TTL-serial cable into the carrier board’s GPIO header: black to pin 6, white to pin 8, green to pin 10. Leave the red wire disconnected. Plug the USB end into your computer and note which device node it grabs (probably /dev/ttyUSB0). Fire up your favorite comm program (Minicom, perhaps?) on that port at 115.2 kbps: minicom -D /dev/ttyUSB0 -b 115200
  16. Plug the USB-C power supply back into the “POWER” connector. Watch the boot messages scroll by for a few seconds, and press Enter to get a root prompt in OpenWRT.
  17. Install the modules we stored in /ipks: cd /ipks && for i in r8169-firmware_20201118-3_aarch64_cortex-a72.ipk kmod-libphy_5.4.143-1_aarch64_cortex-a72.ipk kmod-phy-realtek_5.4.143-1_aarch64_cortex-a72.ipk kmod-mii_5.4.143-1_aarch64_cortex-a72.ipk r8169-firmware_20201118-3_aarch64_cortex-a72.ipk; do opkg install $i; done
  18. Shut down OpenWRT: poweroff. Wait for the green LED to quit blinking. Unplug the power and flip the USBBOOT switch back to “off” (away from the MicroSD slot).
  19. Disconnect the serial cable and run a network cable from the LAN port (the one closer to the power connector) to your computer. Plug the power back in, wait a few seconds for it to boot, and go to https://192.168.1.1; it should bring up OpenWRT’s LuCI interface. You’re done! Configure OpenWRT to your liking, then move it closer to your network gear and run cables from the LAN port to an empty switch port and from the WAN port to whatever provides your Internet (cable modem, DSL modem, or whatever).

All that’s left now is to put it in a case (either 3D-printed, or maybe just the laser-cut case from DFRobot) and add a wireless access point. I’ve had good luck with a bunch of Cisco WAP150s at work, but I’m open to suggestions. (I could’ve gotten one of the WiFi-equipped CM4s, but my understanding is that since they’re connected over SPI to the CM4’s SoC, their speed is not so good.)

School board won’t end face-diaper mandate, so parents toss them out, elect replacements, and end the mandate themselves

MOAR PLEASE:

https://rumble.com/vg6zcx-vail-school-board-walks-out-of-meeting-parents-elect-new-school-board-and-v.html

Hundreds of parents showed up to the Vail [AZ?] School Board meeting to demand the board make masks optional. The board didn’t want to hear it so they walked out of the meeting before it even began. So the parents, under Robert’s Rules of Order, voted in a new school board. Then, the new members voted to end the mask requirement in Vail Schools. The old school board members revealed exactly who they are and that includes GOP LD 10 Chairman, Chris King.

The link to Rumble came from a radio station in Tucson, so I’m guessing the “Vail” mentioned above is the one in Arizona, not the one in Colorado. Vail, AZ, is maybe 15 or so miles southeast of Tucson.

A password manager in your pocket

It doesn’t do everything that KeePass does, but it keeps the four passwords you use most on your keychain (or will, once it’s in the 3D-printed case I’ve planned for it). It plugs into a USB port and shows up as a keyboard. It also shows up as a serial interface, through which you can set the text to be sent by each key.

In the past, I’ve ordered boards from companies that make them and stuffed them with parts myself. This time, the boards were handed off to an assembly service that put on everything except the button domes. (They’re not supposed to be soldered; a piece of tape is sufficient to keep them in place.)

Total cost for PCB fabrication and assembly? $52 for 10 pieces of bespoke electronics. The button domes add about another $2 per board, and 3D-printed cases should be about a quarter each.

It’s amazing times we live in that such things are possible. :)

(Source for everything is at https://gitlab.com/salfter/key_dongle.)

Some good news on cancer, for once

tl;dr: A new combination of drugs long used in the treatment of breast cancer has produced some stunning results:

New breast cancer treatment wipes out tumours in just 11 DAYS

A new treatment for breast cancer has completely eradicated tumours in just 11 days.

Doctors today described the unexpected results as ‘staggering’ – and said the new two-pronged technique could spare thousands of women from gruelling chemotherapy.

The UK team, announcing their results at the European Breast Cancer Conference in Amsterdam, said they had never seen breast patients respond so quickly to a cancer treatment.

Women who were newly diagnosed with an aggressive form of breast cancer were given the therapy at 23 UK hospitals.

Of the participants in the trial the vast majority – 87 per cent – responded to the treatment, with tests showing that the cancer had stopped producing more cells.

But for some women the results were more dramatic.

In 11 per cent the tumours had completely vanished, to the surprise of surgeons, and for another 17 per cent they had significantly shrunk.

The drugs involved aren’t particularly expensive, either, as cancer drugs go: around $2150 for an 11-day course.  The patent on one of them is about to expire, which should knock that price down a fair bit.

Need the “owner’s manual” for your M1 Garand?

I’ve converted it to an eBook:

Field Manual 23-5: U.S. Rifle, Caliber .30, M1

It’s a faithful rendition of what I think is the last edition (published in 1965), formatted for your Kindle or other compatible device.  Cribbed from the description I provided to Amazon:

An ebook conversion of the Army’s “owner’s manual” for the M1 Garand battle rifle. More convenient than the PDFs that exist, and easy to load into your phone so you have it on hand at the range or in the field. Includes information on basic handling and operation, field stripping, a description of how the rifle operates, how to resolve stoppages, and routine maintenance.

Awesomeness

Found this on the book of faces…an 81-year-old not only finished a beer mile with a not-too-bad time, but she beat her daughter and son-in-law while she was at it:

This 81-Year-Old Grandma Is Better at Drinking and Running Than You Are

If you’ve ever subjected your body to a beer mile race — easily one of the world’s ultimate tests of physical and emotional endurance — you might want to contact Elvira Montes for some pointers. The 81-year-old grandmother of three was, not only the oldest person to finish during the 2015 FloTrack Beer Mile World Championships in Austin, Texas on Tuesday night, but also outran her daughter and son-in-law, according to a report byRunner’s World. Needless to say, she’s a freaking hero.

[…]

While the beer mile world champions crossed the finish line in a cloud of sweat and suds faster than you can pour a beer and drink it, Montes finished the race with a damn impressive time of just 20 minutes and 24 seconds — 50 seconds faster than her 47-year-old daughter. She admittedly doesn’t even like beer, but pounded four bottles of KCCO Gold Lager from Resignation Brewery, according to the report.

The race marked Montes’ second beer run, having participated in the same event last year. Next year, she plans to break 20 minutes and said she can improve by drinking her beer faster.


CyanogenMod 12.1 brings back stock features on the Moto X

About two years ago, I replaced my iPhone 4 with a Moto X.  One of the coolest features at the time was that you could shake it while it was “asleep” to bring up the camera.  It’d also wake up the screen periodically to show the time and recent notifications.

These features went away when I unlocked the bootloader and switched from stock firmware to CyanogenMod 11 a while back, but the advantages of a mostly-unlocked phone (still need a SIM unlock…can probably do that next month for free when my plan’s up) outweighed the disadvantages.

Today, I got around to updating to CyanogenMod 12.1.  It took an unusually long time to install and Lollipop has moved lots of things around compared to where they were in KitKat, but the hardware is still able to keep up with it.  More importantly, the sleep-mode notifications and the shake-to-switch-to-the-camera feature are back.  It was nice to not have to unlock the phone and dig through the menus to fire up the camera; shake it anytime and the camera’s ready in about a second.  That means fewer missed shots when something happens.

Who knew? The Google Play Books Chrome app has an offline mode.

IMG_20151104_130132A new tablet arrived yesterday: an HP Stream 7, which set me back a whopping $60 at Woot.  After letting it update itself from Windows 8.1 to Windows 10 (yes, it runs Windows, not Android or iOS) and putting Chrome and a few other apps on it, I set out to find a decent ebook reader.  Ideally, it’d support ePub and would sync bookmarks between existing devices.

I have been using Google Play Books to share my collection between Android and iOS devices.  Apps are available for both to download part or all of your collection for offline reading; bookmarks are synced when online.  Unfortunately, there’s no dedicated Windows app…but it turns out that’s not a problem.

After trying several ebook apps for Windows and finding them wanting in one measure or another, I ran across references to a couple of things I didn’t know about:

  • Google Play Books is available as a Chrome app
  • The Chrome app can use HTML5 local storage to hold selected ebooks for offline reading

Sweet!  The only tricky part now was selecting books for offline reading.  You’re supposed to hover the mouse pointer over the title you want to download, then click a “make available offline” checkbox that pops up.  Without a mouse, though, you can’t hover over anything.

That’s where a program called TouchMousePointer comes into play.  It converts part of the screen area into a touchpad, and puts up a mouse pointer that you can hover over the books you want to download.  It’s easily toggled off most of the time, but is there if you need more precise positioning than your fingers can deliver (as apps written with a mouse in mind might need).

IMG_20151104_130807Here’s the end result…note that the tablet’s in airplane mode.  The screen doesn’t really look like that; it’s some weird interaction between it and the camera in my phone that you’re seeing.