Run Windows apps in a browser with Wine and Docker

ProMash is a program I’ve used to manage beer recipes for over 20 years. There was only ever a Windows version published, but I mostly ran it under Linux with Wine. I had the entire program directory (with recipes, brewing sessions, etc.) checked into checked into Git so I could pull it down on whatever computer I was using at the time and run it.

A while back, I Dockerized my home server. One of the neat tricks I found it could do was run graphical Linux apps through a web browser: Calibre, Picard, etc. I then got the idea to try containerizing ProMash. It can run under Wine and Wine runs under Linux, so it should work…right?

Turns out it works pretty well. Start with this Dockerfile, which adds Wine to the linuxserver.io base image and adds the program to be run:

FROM ghcr.io/linuxserver/baseimage-selkies:arch
RUN pacman -Syu || true && pacman -S --noconfirm wine wine-gecko && yes | pacman -Scc
ADD --chown=911:911 . /config/promash
COPY /root /

For an app that doesn’t need to be installed (just run from a random directory), it’s enough to just make it visible within the container and add a config file to tell the container to launch it. First, docker-compose.yml:

services:
  promash:
    build: .
    container_name: promash
    restart: unless-stopped
    environment:
      CUSTOM_PORT: 8080
      CUSTOM_HTTPS_PORT: 8081
    networks:
      - www
    volumes:
      - promash-data:/config/promash
    labels:
      caddy: promash.alfter.us
      #caddy.basic_auth.salfter: "$PASSWD"
      caddy.import: secure *
      caddy.reverse_proxy: promash.www:8080
      caddy.log.output: discard
          
networks:
  www:
    name: www
    external: true    
    
volumes:
  promash-data:
    name: promash-data
    external: true

This is set up to use caddy-docker-proxy and to control access to ProMash with an Authelia SSO instance (caddy.import: secure *), but these are easily replaced with whatever proxy option you prefer. The ProMash directory within the container gets written out to a named volume so my changes don’t get lost and my recipes are easily backed up.

One more file is needed to tell the container how to launch your program. root/defaults/autostart should look something like this:

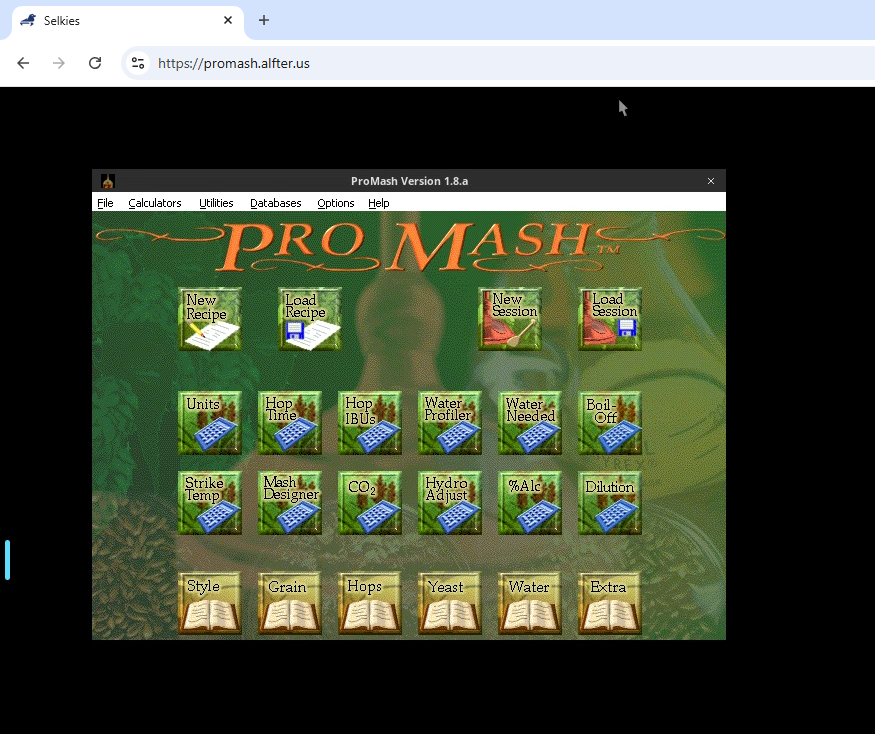
(cd /config/promash && wine ProMash.exe)

These three files were added to my ProMash repo, which was then checked out onto my home server and launched. This is what it looks like in the browser:

This should be adaptable to any Windows app that will run under Wine (which is an ever-increasing percentage of them). Programs that need to be installed would be a bit trickier to get running, but it should still be possible to get them running.

Cheatsheet: build and install AUR packages in a chroot on Artix Linux

One of my machines was having trouble rebuilding ffmpeg-libfdk_aac recently. It complained about a dependency conflict, even though I had just built it on another machine without issue and the dependencies should have been the same between them. A pinned comment suggests building in a clean chroot, but the linked directions are for Arch Linux and don’t work on Artix Linux due to systemd not being available.

There is a way. Buildpkg, which on Artix is provided by artools-pkg, makes the job fairly simple. Install it:

yay -S artools-pkg

Once that’s done, check out the package you want from AUR:

cd /tmp
git clone https://aur.archlinux.org/ffmpeg-libfdk_aac
cd ffmpeg-libfdk_aac

Build it:

buildpkg -r $(pwd)/chroot

Install it:

makepkg -i

Docker: list named volumes only

docker volume ls doesn’t appear to provide an easy way to only list named volumes. You can list all volumes easily enough, and you can list only anonymous volumes with something like docker volume ls -f label=com.docker.volume.anonymous. If it provided a way to negate the search term, you could get just the named volumes, which might be useful for various purposes (backup, moving volumes between servers, etc.).

A little bit of shell wizardry will get you what you want:

v=`docker volume ls -q`; for i in `docker volume ls -f label=com.docker.volume.anonymous -q`; do v="`echo $v | sed "s/$i//"`"; done

This lists all volumes, and then removes the anonymous volumes.

Make your own double-sided PCBs with plated through-holes

Plated through-holes have long been one of the things you could get from the likes of OSH Park or JLCPCB that were difficult to impossible to produce at home. This morning, I stumbled across this video from four years ago:

This method uses chemicals that should be relatively easy to source and a bench power supply for constant-current plating. He uses a CNC mill to mill and drill the board and a 3D-printed frame to support the PCB and copper plates, but I could’ve done this back in the day with etched photo-resist boards and a drill press.

I can’t believe we’re having this discussion again

It’s like people forgot the fight over DeCSS back in the ’90s:

a=1.59;b=5.93;c=10.68;d=13;e=18.67;f=20.26;$fn=64;module c(r,x,y){translate([x,y])circle(
r);}module s(h,w,x,y){translate([x,y])square([h,w]);}module e(h,x,y){rotate([x,y])linear_
extrude(h){children();}}module P(j,k){polygon([for(i=[j:k])[X[i],Y[i]]]);}X=[0,0,2.76,3.5
6,3.56,4.35,14.7,15.5,15.5,23-b,23.9,24.34,28.5,29.12,33.95,35.1,39.9,39.3,37,f,37,37,36,
34,26.5,18.46,e,f,f];Y=[0,d,d,12.3,4,3.2,3.2,4,c,13.43,17.37,38-f,22.7,23,23,28-b,1.75,.8
,.25,0,0,.25,.84,9.46,14.2,12.5,8.6,7,0];difference(){e(12.44){difference(){union(){P(0,1
9);c(a*2,e,c);}c(a,23.12,18.75);c(2,18.9,10.56);c(6.35,27.82,8);P(20,28);}c(a,e,7);}e(23,
-90,0){difference(){s(22.43,d,0,-d);hull(){s(1,1,22,0);c(b,5.3,-6.5);c(b,5.3,-5.81);c(b,1
7.46,-6.64);}}c(.79,23.1,-21+c);s(a,2.68,22.3,-d);}translate([23.1,0])e(e,0,90)hull(){s(1
,1,-d,19.24);s(a*2,1,-12.7,0);c(a,-11.11,18.65);}}

Whatever you do, don’t paste the code block above into OpenSCAD and render it into an STL. Whatever you do, do not load that STL into a slicer. Whatever you do, don’t send that sliced STL to your 3D printer. Above all else, don’t pull the resulting object off of your printer and drop it into an AR-pattern modern sporting rifle.

:-)

(Code swiped from here.)

Cheatsheet: working root on Fairphone 5 (with AdAway and Netflix, still need to figure out Google Wallet)

An OTA upgrade failed to take properly, so I was in a position to wipe my phone and try again. I had been using Magisk previously to unlock my phones (including the Fairphone 5 I’m currently using), but getting certain picky apps (looking at you, Google Wallet, Netflix, and eBay) either didn’t work at all or worked with limited functionality.

This time around, I went with APatch instead of Magisk, and it’s been much easier to get everything working. You’ll need the following:

  • the latest APatch APK, downloaded on your phone and installed
  • the latest bindhosts release (needed for AdAway to work)
  • the liboemcrypto.so odm disabler (needed for Netflix to work)
  • boot.img extracted from the firmware you’re currently running (as of this writing, I’m using FP5-VT2E-factory.zip)
  • the Android SDK Developer Tools (specifically, you’ll need adb and fastboot to install the patched boot.img)
  • an unlocked bootloader on your phone

The first three should apply to any rooted Android device, so this guide isn’t necessarily specific to the Fairphone 5 (or Fairphone devices in general).

  1. Extract boot.img from your phone’s firmware. The easiest way to do this on the Fairphone 5 is to extract it from the firmware from the provided image files. Copy it onto a USB-C flash stick.
  2. Launch APatch. Tap the “install” button (looks like a phone with a down-arrow) and select “Select a boot image to patch” (the only option on a phone that’s not yet rooted). Navigate to boot.img on your USB stick. Type in a “superkey” (letters and digits, probably at least 16 of them for good security, and save it in your password manager) and tap “Start.” After a few seconds, it’ll create a file named something like apatch_patched_something-semi-random.img in the Download directory in your phone’s internal storage. Copy that file onto the USB stick and then move the stick from your phone to your computer.
  3. Make sure USB debugging is enabled on your phone (enable developer mode if you haven’t already).
  4. Open a shell prompt on your computer and navigate to wherever the patched boot image is stored. Use adb reboot bootloader to kick your phone into fastboot mode, then fastboot flash boot apatch_patched_something-semi-random.img to upload the patched image to your phone, then fastboot reboot to reboot. With this, your phone is now rooted!
  5. Once your phone is restarted, go back into APatch. Tap on the APModule button at the bottom (looks like a 3×3 grid), then tap the Install button to install both bindhosts and the liboemcrypto.so odm disabler. You’ll be prompted to reboot after installing each of these.
  6. Install AdAway. Before launching it for the first time, go back to Apatch. Tap on the Superuser button at the bottom (looks like a shield), scroll to AdAway, and make sure that root is enabled.
  7. Install Netflix, Google Wallet (still doesn’t work for payments), eBay, or whatever other troublesome apps you want. They should just work now. Unlike AdAway, there is no need to enable root for these apps. (Come to think of it, the Charles Schwab app wasn’t letting me log in recently. It works now, too, though whether that’s due to the different root or an update to the app, I couldn’t say.)

Update media paths in Sonarr and Radarr the fast way

The directory structure on my media server is largely a holdover from when I was using a pathetically slow Buffalo Linkstation Quad NAS box as my media server years ago. It was a long way from the recommendations made here. I decided to try doing something about that. This is a quick write-up of what I did.

My current server is a homebuilt machine, put together around an Asrock Rack X470D4U2-2T with a Ryzen 5 2600, 32 GB of RAM, and four 8-TB 7200rpm NAS hard drives in software RAID-5. It runs Arch Linux on the metal, with Docker running on top of that to support all of the services that run on it. It’s been a pretty solid little box that sits next to the living-room TV, on the floor.

The RAID array is at /mnt/storage. It has two subdirectories, movies and tv-shows, with the obvious contents. I use the lscr.io/linuxserver/sonarr and lscr.io/linuxserver/radarr Docker images. /mnt/storage/tv-shows was originally mounted in the Sonarr container to /tv and /mnt/storage/movies was originally mounted in the Radarr container to /movies. These were both in accordance with the documentation provided for the images.

Now, /mnt/storage is mounted in both containers to /data. /data/tv-shows is added as a root folder in Sonarr and /data/movies is added as a root folder in Radarr. If you look under “Library Import” in the *arr interface, the original root folder will show few (if any) unmapped folders while the new root folder will show a whole bunch of unmapped folders.

At first, I was going to hit each show or movie individually and edit the root folder setting manually. This was going to be inordinately tedious. Fortunately, there is a better way. It involves changing root folder paths in the SQLite databases.

First, we’ll do Sonarr. Bring up the Sonarr database in the SQLite command-line client:

docker exec sonarr apk add --no-cache sqlite; docker exec -it sonarr sqlite3 /config/sonarr.db

Run this query to update the paths. These are what I used, as described above; you’ll want to adjust for your setup.

update Series set Path=concat('/data/tv-shows/', substr(Path, 5)) where Path not like '/data/%';

Exit out of the client with .quit, then restart Sonarr with docker compose restart sonarr. If you go back to “Library Import” in Sonarr, you should now see that your shows have moved from the old root to the new root.

Radarr is similar, but with an extra SQL query to update the auto-managed collections. First, bring up the SQLite client:

docker exec radarr apk add --no-cache sqlite; docker exec -it radarr sqlite3 /config/radarr.db

These are the queries I used; again, adjust yours for your setup.

update Movies set Path=concat('/data/movies/', substr(Path, 9)) where Path like '/movies/%';
update Collections set RootFolderPath='/data/movies' where RootFolderPath='/movies';

Exit out of the client with .quit, then restart Radarr with docker compose restart radarr. If you go back to “Library Import” in Radarr, you should now see that your movies have moved from the old root to the new root.

At this point, you can remove the old root folders within the *arrs and update your Docker Compose files accordingly.

Cheatsheet: automated subtitle generation from the command line

I ran across this post on running Whisper WebUI under Docker a while back and had it up and running for a while. Something broke in a recent release, though, and I tend to prefer command-line tools for things, so I went looking for alternatives.

The tools Whisper WebUI runs under the hood have command-line equivalents available. In particular, there’s insanely-fast-whisper-cli. Getting it running wasn’t particularly difficult…if anything, it was easier than getting GPU compute running within Docker containers:

git clone https://github.com/ochen1/insanely-fast-whisper-cli
sudo mv insanely-fast-whisper-cli /opt
sudo chown -R $(whoami) /opt/insanely-fast-whisper-cli
python -m venv /opt/insanely-fast-whisper-cli
source /opt/insanely-fast-whisper-cli/bin/activate
pip install -r requirements.txt
pip install torch==2.7.0 torchvision==0.22.0 torchaudio==2.7.0 --index-url https://download.pytorch.org/whl/cu126
cat <<EOF | sudo tee /usr/local/bin/whisper-cli
#!/usr/bin/env bash
source /opt/insanely-fast-whisper-cli/bin/activate
python /opt/insanely-fast-whisper-cli/insanely-fast-whisper.py "$@"
EOF
sudo chmod +x /usr/local/bin/whisper-cli

This uses a downgraded torch (v2.7.0) that I need to use whisper-cli with my GeForce GTX 1070. If you have a newer card, you can probably leave out the pip install torch==2.7.0... bit.

Once all this is in place, you can then use something like whisper-cli foo.avi to produce foo.srt.

You might find sometimes that background music confuses Whisper. There’s another tool for that: vocal. Installation is even simpler:

sudo mkdir /opt/vocal
sudo chown -R $(whoami) /opt/vocal
python -m venv /opt/vocal
source /opt/vocal/bin/activate
pip install vocal
pip install torch==2.7.0 torchvision==0.22.0 torchaudio==2.7.0 --index-url https://download.pytorch.org/whl/cu126
cat <<EOF | sudo tee /usr/local/bin/vocali
#!/usr/bin/env bash
source /opt/vocal/bin/activate
vocali "$@"
EOF
sudo chmod +x /usr/local/bin/vocali

vocali -i in.mkv -o in.mp3 will produce a file with all of the background music stripped out. Vocals will be retained, as will anything spoken in a normal voice.